
Fall Semester, 2001
Introduction
© 2001, All Rights Reserved, SDSU & Roger Whitney
San Diego State University -- This page last updated 04-Sep-01

|
CS 535 Object-Oriented Programming & Design Fall Semester, 2001 Introduction |
|
|---|---|---|
|
© 2001, All Rights Reserved, SDSU & Roger Whitney San Diego State University -- This page last updated 04-Sep-01 |
Introduction
Why Smalltalk
|
Language |
Lines
of code/function point
|
|
Smalltalk |
21 |
|
Ada
95
|
49 |
|
Java |
53 |
|
C++ |
53 |
|
COBOL |
107 |
|
C |
128
|
Learning Smalltalk
Some History 1967 Simula-67
Smalltalk Influences
Object-Oriented Programming
GUI
Versions of Smalltalk
VisualWorks
VisualAge for Smalltalk
Squeak
Dolphin
Smalltalk MT
Smalltalk X
Smallscript
PocketSmalltalk
Smalltalk & Bytecode
Smalltalk is compiled to a bytecode for a virtual machine
Bytecode is same on all machines
VisualWorks has VM's for:
VisualWorks
Parts of VisualWorks
Executable Virtual Machine (visual, visual.exe)
Starting VisualWorks on Macintosh
Method 1
Some VisualWorks Environment
It is hard to explain on paper how to use GUIs. The best thing is to use the GUI and have an expert user nearby. The following may help you get started. For more information see Chapter 1 The VisualWorks Environment, VisualWorks Application Developer’s Guide, doc/vwadg.pdf in the VisualWorks installation.
VisualWorks uses three logical buttons
|
|
3-Button
|
2-Button |
1-Button |
|
Select |
Left
button
|
Left
Button
|
Button |
|
Operate |
Right
button
|
Right
button
|
Ctrl+Button |
|
Window |
Middle
button
|
Ctrl+Left
button
|
command+Button |
Windows on Startup
Launcher 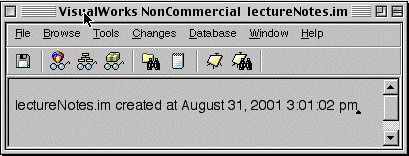
The Launcher is the main window in VisualWorks. It is your main starting point in the VisualWorks IDE. Do not close this window. We will come back to this window.
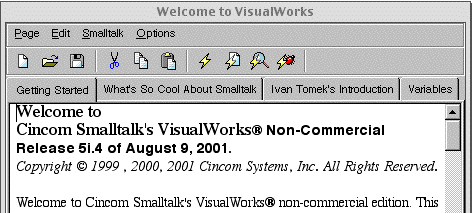
The welcome to VisualWorks window contains some useful information. Ivan Tomek’s introduction will lead you through much of Smalltalk. Try going through it.
Lesson Runner
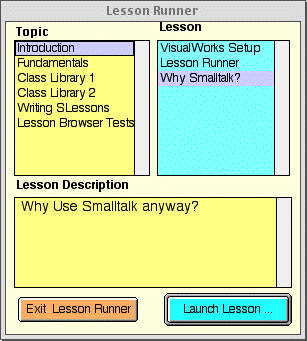
Lesson runner leads you through Smalltalk syntax, some of the Smalltalk classes and some tools.
Workspace
Workspaces are good places to try out Smalltalk code. There are two ways to open a Workspace from the Launcher. First you can click on the Notepad icon in the Launcher. The second way is to select the “Workspace” item in the Tools menu in the Launcher.
.

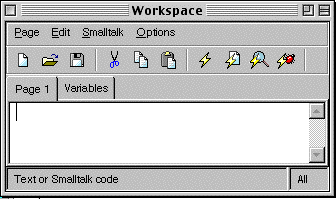
There are a number of interesting things one can do with the Workspace. The most important is to execute code. The code can be run with four different options: do it, print it, inspect it, and debug it. To run the code first select the code you wish to run. The code should now be highlighted. Now run the code using the option you wish by: clicking on the corresponding icon, selecting the corresponding item in the “Smalltalk” menu, or using the short-cut keys.
Do it (ctrl-d)


Print it
For the following example, the workspace tool bar was closed to make the graphic a bit smaller. This is done using the option menu in the workspace.

In a workspace, type the text: 30 factorial. Now try selecting the text and running the code using “do it”. Seemingly nothing happens. The code is run, but there is no indication of this. Now run the code using “print it”. This will run the code and print the result of the code in the workspace. As you can see below, the result is a large integer. Smalltalk can handle any integer that your machine as memory for.

Using the Transcript
Smalltalk has a special output window called the Transcript. The text pane in the Launcher is the Transcript. You can write to the Transcript from your code. While in some languages this is done a lot in debugging, Smalltalk provides a better way to debug.
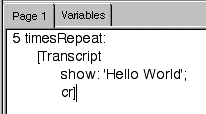
Type the code shown above in a workspace and run the code using “do it”. The following will appear in the Transcript.
Exiting from VisualWorks
To exit from VisualWorks, select the “Exit VisualWorks” item in the “File” menu of the Launcher.
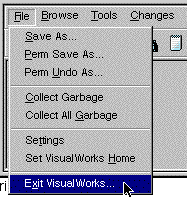
You will get a dialog asking if you want to save the image. Saving the image put the current state of the image on disk. When you restart the image it will be in the same state as when you saved it. Normally you want to save the image. If you don’t save the image it takes some effort to recover your work.

Saving your image changes the state of the image on disk. If you save the image under the name visual, then you will lose the original state the image. So save the image under a different name. When you save an image “.im” is appended to the end of the name. Hence there is no need to put the “.im” ending on the name.
Some Text Editing Short Cuts
Selection shortcuts (double click)
To select text, use the following double-click shortcuts.
Double-click at start or end of a window to select all text in the window.
Double-click at start of line to select the line. Does not work on the first line.
Double-click at end of line to select the line. Does on work on the last line.
Double-click just after an opening (or just before the closing) of ' or [ or ( or " selects all text surrounded by the symbols.
Double-click inside a word or selector to select the word or selector.Ctrl keysPress at the same time the control key and the second key to:
<Ctrl> f inserts ifFalse: into the text.
<Ctrl> t inserts ifTrue: into the text.
<Ctrl> g inserts := into the text.
<Ctrl> d inserts today's date into the text.
<Ctrl> s (search or find) finds the next instance of the string in your copy buffer (last copied or cut string)
<Ctrl> e (replace) opens a replace dialog
<Ctrl> a (find) opens a find dialog
<Ctrl> c is equivalent to Copy,
<Ctrl> z will Undo the most recent text change,
<Ctrl> v is equivalent to PasteESC keys
Press and release the ESC key then press the second key to:
ESC b changes the selected text to bold.
ESC i changes the selected text to italic.
ESC u underlines the selected text.
When the letter is uppercase (B, I, U), the effect is reversed: ESC U removes underline, etc.
ESC + increases the font size of the selected text
ESC - decreases font size of the selected text
ESC followed by < or ' or " or [ or ( adds surrounding < ' " [ ( to the selected text.
ESC followed by <tab> selects the text just typed in
ESC x removes style changes to current selection and returns to default font.
Alt Keys
Alt keys are also used as menu accelerator keys. Since menu accelerator keys have priority the following keys may not work in all text windows.
<alt> a (again) repeats the last text change
<alt> A repeats the last text change for rest of text in window
<alt> c copies selected text into copy buffer
<alt> d (do it) compiles and executes selected text
<alt> f finds the next occurrence of the selected text
<alt> F finds the next occurrence of the text in the copy buffer
<alt> n finds the next occurrence of the selected text
<alt> p pastes the copy buffer into the current location
<alt> P pastes from the last 5 elements of copy buffer
<alt> z undoes the last edit
Copyright ©, All rights reserved.
2000 SDSU & Roger Whitney, 5500 Campanile Drive, San Diego, CA 92182-7700 USA.
OpenContent license defines the copyright on this document.
visitors since 04-Sep-01 Next